With subfiles you can create a display file with lists of items. Let's see how that's done.
A subfile is a display file where you can place a listing of values and process changes on the list. The list of members that you can see in the PDM is an example of a subfile.
In this chapter we'll create a subfile which will show all the cards from a client given its ID. To make the manipulation of several tables easier, we'll create a view with the fields we'll use on the subfile. In STRSQL insert this code:
CREATE VIEW CLICARD AS SELECT CL.ID_CLI, CR.ID_CRD, SH.NAME_SHP, CR.SHOP_CRD
FROM DEMO/CLIENTS CL, DEMO/SHOP SH, DEMO/CARDS CR
WHERE CL.ID_CLI = CR.CLIENT_CRD AND CR.SHOP_CRD = SH.ID_SHP
Open SDA (STRSDA) and create a new member:

Create a BOTTOM record that should look like this:

And the TOP record like this:
Let's create the subfile now. Create a new record, name it LIST, the record type is SFL:

When you press Enter a new record appears. Write SFLCTL on it:
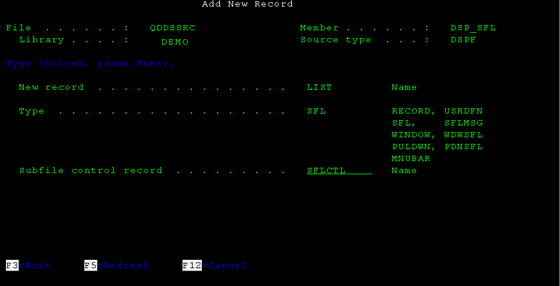
This field creates a subfile control record, which works like the heading on the list.
You have to activate some options now:

On the General Keywords menu insert the data you see below:

These indicators allow us to manipulate the status of the subfile from the RPG code. Press Enter to go back to the previous screen. Select Subfile display layout.

On subfile maximum size type 9999 and on the number of records for page type 9:

Press enter to go back. Select the option Select Record Keyword:

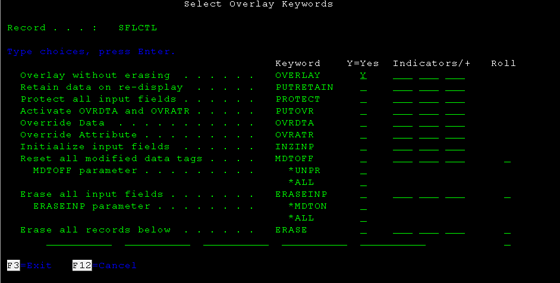
Choose Overlay keywords:

Select Overlay without erasing:
Press Enter until you're back on this screen:
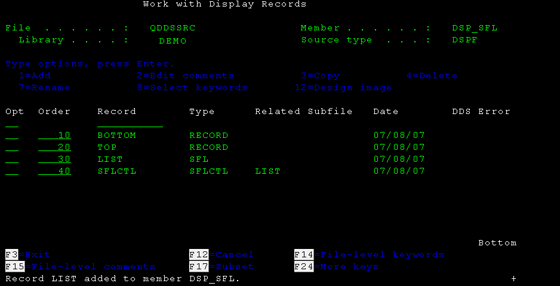
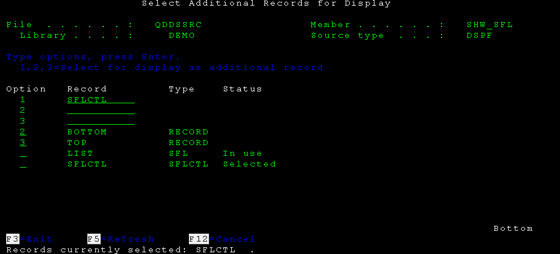
Open the SFLCTL record. By default the record list is already visible on the design screen. Select to visualize the other 2 records, TOM and BOTTOM (F9).

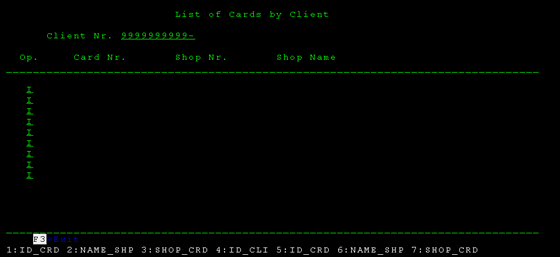
Back to the design screen, write at the top “Client Nr.”. Select the fields from CLICARD view for input/output (F10) and select the ID_CLI field:

Type the titles of the subfile's columns and a separating line:
Let's add some proprieties to the Client ID field. Place an * before to the left of the field.

We're going to add an indicator to this field, which will be activated when no record is found for an ID inserted (either the ID doesn't exist or it doesn't have any associated cards). Option Error Messages:

Insert the following information:

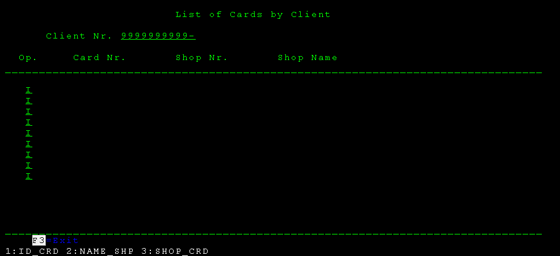
Close this record and open the LIST record. Select the TOP and BOTTOM records for display (F9):
To create an input field, where the user will type the options, type '+i' on the same position as in the following image and press Enter.

Notice how the field spread across the 9 line you previously defined as the subfile page size.
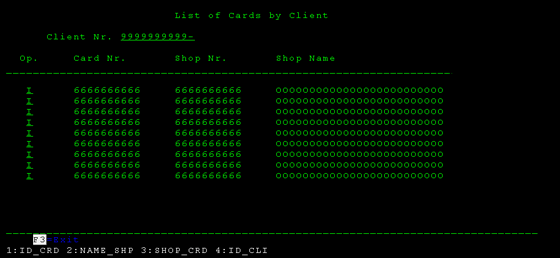
Select the records from CLICARD view for output.
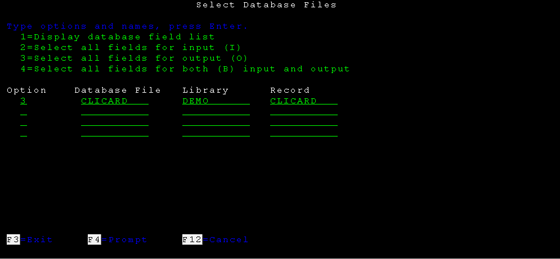
The fields will probably be listed twice, because the SDA will show you the field that had been previously loaded from I/O in the SFLCTL record. You should select the fields further to the right, because they are the last ones loaded. You must be careful selecting the fields.
If there are more fields than the ones that can fit the message line, a plus (+) sign will appear at the end of the line. Press Page Down to see the remaining fields.
Place the fields on their positions:

The final result:
Don't forget to activate the indicator 03 at file-level so that “F3=Exit” can work and add the keyword INDARA to the code. Check out the Display file chapter if you don't remember how to do this.
You must add the red line to the SFLCTL record:
A R SFLCTL SFLCTL(LIST)
A SFLSIZ(9999)
A SFLPAG(0009)
A OVERLAY
A 30 SFLDSP
A 31 SFLDSPCTL
A 35 SFLCLR
A 33 SFLEND(*MORE)
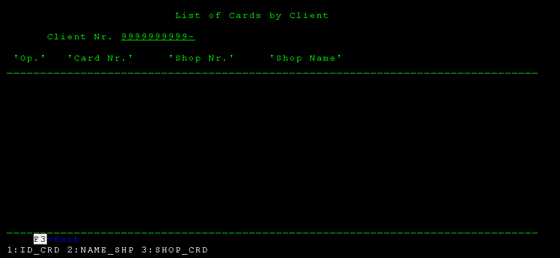
A 4 8'Client Nr.'
A ID_CLI R B 4 19REFFLD(CLICARD/ID_CLI DEMO/CLICARD)
A 90 ERRMSG('No Data Found')
A 6 4'Op.'
A 6 12'Card Nr.'
A 6 27'Shop Nr.'
A 6 42'Shop Name'
A 7 2'__________________________________-
A ___________________________________-
A __________'
A RRN 4S 0H SFLRCDNBR(CURSOR)In the LIST record change the name of the input field to OPTION. By default it must be named FLD001, or something like it.
A R LIST SFL
A OPTION 1A I 9 5
(...)
Executing the subfile
To run the subfile you must create an RPGLE member. Check out the file QRPGLESRC.SHW_SFL for more details on how to write this member.
When you run the RPGLE code:
